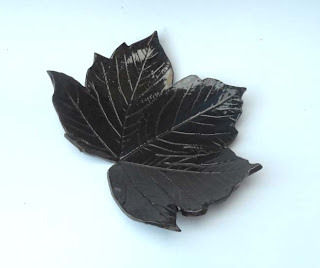
A few weeks ago we glazed our leaf plates in preparation for our Craft fair in the run up to Christmas.
That is my test leaf on the bottom right.
This batch of leaf plates have emerged from the kiln and I think they look really quite beautiful!
Green glazes, the one in the foreground is a beautiful metallic glaze!
Now some of these leaf plates are a bit uneven on the backs - and a few of our experienced potters think that because the backs are uneven they should not be sold, or they should be sold as seconds.
SO
I would like to do my first 52-Wednesdays-for-art Poll! Can you please comment to the post or email me at kstearn@hotmail.com and let me know the following:
1. Would buy any of these for yourself or for a gift?
2. How much would you pay for them? (ok to give a range as there are a range of sizes)
3. Would it matter to you if the underside/back of the leaf was slightly uneven or the glaze was uneven?
Looking forward to the comments!
Wednesday, 18 August 2010
Sunday, 15 August 2010
Week 30 - various pottery project resolved
KS&W has been working hard on the summer clearout, which includes getting everything fired! From earlier in the year, you may remember some of these projects...
These red clay bowls that I used my letter stamps on...
PEPPER, SALT and SOUP!
Salt and pepper were too thickly glazed, really only the SOUP one worked...
Leaf plates that were meant for Raku...
'Patchwork bowl' that was meant for Raku...looking quite fabulous in blue!!
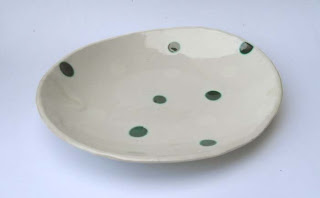
'Polka dot' bowls where I experimented with balls of coloured slip rolled into the clay...
One of these is croxton (grey clay) the other is terra cotta (red clay). You can't really tell which is which! The dark green slip has reacted with the white glaze and sort of bled into it, it is really a nice effect. Unfortunately the white glaze has totally almost totally covered up the white polka dots. I should have glazed the terra cotta one in clear as it already looked so nice! Well there is a lot more experimenting to be done here...perhaps trying I will be trying dark blue and green spots!
All comments welcome on the above pieces!
Wednesday, 11 August 2010
week 29 - More jewellery
I had my second day of jewellery making today - I am extremely pleased with the results and learned some good skills that will come in handy in the future.
This pile of rings turned into the bracelet chain at the bottom of the picture!
It is a 'chain mail' technique which is a bit fiddly, but once you get going it is very therapeutic.
We also used a similar technique to make 'clusters' these are beads strung on a wire and then connected together. I made a purple pendant that will go on a long cord (not pictured) and will be the perfect accessory for a lavendar linen dress that I have.
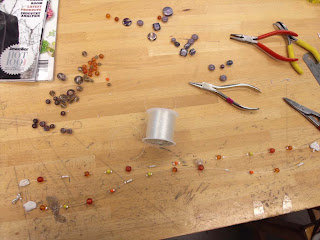
The next thing we made was a necklace strung on plastic wire (basically .5m fishing line) so I made this necklace with a mixture of beads and buttons. In this technique you use 'crimps' to hold things in place on the wire, it is really ingenious how it works. A few pearls and you would easily have something nice for a wedding!
Close up:
Here is the finished article!
Tuesday, 3 August 2010
week 28 - Necklace and matching earrings...
KS&W is semi closed for the summer clear-out, so I took the opportunity to do a few day courses in jewellery. The first one was beginners jewellery, I had no idea what to expect! Turns out it was a quite intensive course! In the morning we worked with bits of copper, sawing, filling, sanding, cleaning, etc...then after lunch we made objects in silver! I have never done anything like it before - but I went home with a very professional looking necklace and matching earrings!
It is quite hard on your hands, holding small bits of metal and filing or polishing, but definitely worth it!
Tools of the trade - those 4 bits of copper are my test pieces. You can see a few bows that I made from copper wire. These were placed on the flat pieces and then run through the metal roller, which is like a printing press for metal.
Our items as they came out of the ball-bearing polisher. (its like the kind of thing you would put rocks in to polish) Both the earings and my bow 3-piece were made using the metal roller.
Eh viola! I wore mine to work today!
And I've got another course next week to look forward to as well! This one is costume jewellery - so will use glass beads...I've got a purple necklace in mind, perhaps a few bracelets??
Labels:
copper,
filing,
metal press,
metal rollers,
polishing,
sawing,
silver,
Yorkshire Craft Centre
Subscribe to:
Posts (Atom)